
This best expandable house guide provides a comprehensive walkthrough for buyers, site managers, and installation crews preparing to deploy a foldable container home. Setting up a 20ft expandable unit can take as little as 15 minutes with an experienced four-person crew—no heavy construction, no specialist contractors required . This expandable house guide covers every phase from site preparation to final lock-down, ensuring your installation proceeds safely and efficiently.
New Understanding Expandable House Specifications
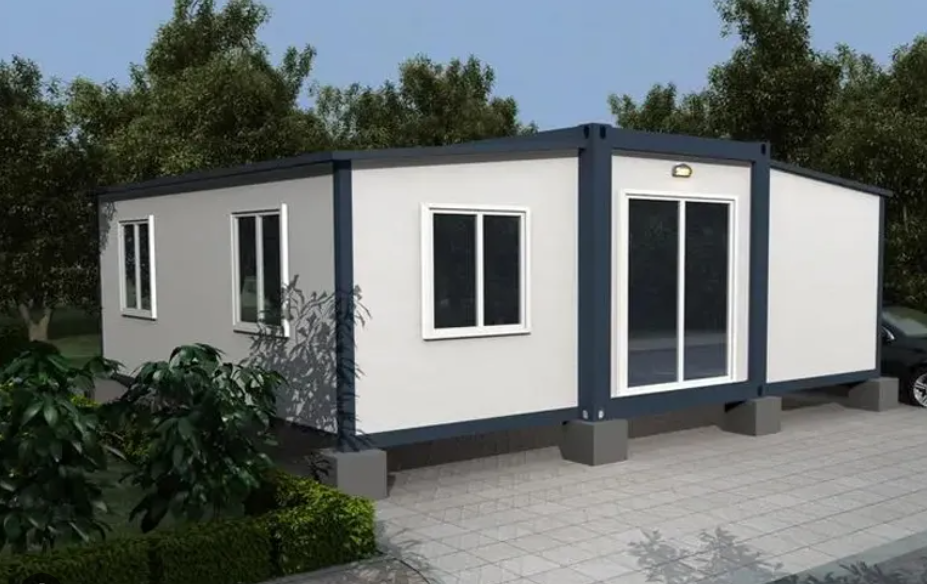
Before beginning any installation, expandable house guide buyers must understand the technical specifications of their unit. A typical 20ft expandable container house ships in a folded state measuring approximately 5,900mm length × 2,200mm width × 2,480mm height . Upon expansion, the installed footprint expands to 5,900mm × 6,320mm, providing approximately 38 square meters of usable interior space.
Two units fit inside a single 40HQ shipping container, making pair purchases economical for vacation rental operators and multi-unit projects. This expandable house guide assumes a standard 20ft model, though larger 40ft variants follow similar installation principles.
Pre-Installation Site Preparation
Ground Requirements
The installation surface does not need to be perfectly flat, but it must be level within ±50mm tolerance . The ground must be capable of bearing the unit‘s loaded weight, including furniture and occupants. A concrete slab provides the most stable foundation option. For temporary placements, compacted gravel or treated timber pad foundations are acceptable alternatives.
Access and Equipment Planning
Confirm before delivery day that the transport truck can physically reach the installation site. A forklift or small crane with minimum 3-ton capacity is required to position the folded unit . Clear a working area at least 3 meters wider than the expanded footprint to allow safe crew movement during expansion.
Team Size and Time Expectations
This expandable house guide recommends a four-person crew for optimal efficiency. CammiHouse installation data indicates experienced teams complete structural setup in 15 minutes, while first-timers should budget 45 to 60 minutes for the full process including verification checks . No welding, concrete pouring, or power tools are required during expansion itself.
Step-by-Step Installation Process
Phase 1: Delivery and Positioning
Step 1: Receive the Unit
The expandable house arrives in folded shipping configuration—a compact rectangular box approximately 2.2 meters wide. Verify packaging integrity and check for any transit damage before signing delivery documents.
Step 2: Position the Unit
Use the forklift or crane to lift the folded house onto the prepared foundation. Align the base frame with pre-marked anchor points before releasing the load. Verify all four corner posts are plumb using a spirit level.
Step 3: Release Roof Latches
Open the roof latches on the expansion side. The roof panel is hinged and swings outward as the first step in the deployment sequence.
Phase 2: Expanding the Structure
Step 4: Deploy Side Walls
Release the folded side-wall section on the expansion side. Two workers push the wall outward while a third guides the floor panel down to ground level.
Step 5: Lock Floor Panel
Secure the extended floor panel into the base frame using built-in mechanical fasteners. Hand-tight pressure is correct at this stage—do not over-tighten.
Step 6: Raise Outer Wall
Swing the outer wall panel to vertical position and engage the wall-to-roof connector clips at the top. The structure now reaches its full installed width.
Phase 3: Securing and Verification
Step 7: Check Panel Alignment
Verify that all panels are flush at every corner. Check that wall-to-floor and wall-to-roof joints are properly engaged.
Step 8: Connect Utilities
Connect the main power inlet socket to the local power supply. Connect water supply pipes to the DN20 PPR connections and wastewater lines to the DN110 PVC outlet . All internal wiring and plumbing are pre-installed at the factory.
Step 9: Install Steps and Access
Attach exterior steps or access ramps as required by local building codes. Verify that all access points are secure and compliant.
Step 10: Final Inspection
Conduct a comprehensive walkthrough: test all electrical outlets and lighting, verify water pressure and drainage, check door and window operation, and confirm that all latches and fasteners are secure.
Insulation and Climate Considerations
This expandable house guide emphasizes that insulation selection must match the deployment climate. Available panel options include EPS, PU, rock wool, and PIR with customizable thicknesses . For cold regions, PU panels combined with graphene underfloor heating are recommended for improved thermal performance. In tropical climates, verify that air conditioning capacity is sufficient for the expanded interior volume.
Common Installation Mistakes to Avoid
First-time installers frequently make several errors documented in this expandable house guide. These include: attempting installation on unlevel ground exceeding tolerance (causing door misalignment), over-tightening mechanical fasteners (damaging seals), neglecting to verify corner post plumb before expansion, and failing to test waterproofing after deployment. Each of these mistakes can compromise structural integrity and void warranty coverage.
Maintenance and Aftercare
Once installed, expandable houses require minimal maintenance. Inspect sealed joints and waterproof tape annually, particularly before rainy seasons. Check mechanical fasteners for loosening after the first month of occupancy. Clean drainage channels to prevent water accumulation. For units deployed in coastal environments, expandable house guide apply corrosion protection to exposed steel components annually.
FAQ
1. How long does it take to set up an expandable house?
A 20ft expandable container house can be set up in as little as 15 minutes with an experienced four-person crew, or 45-60 minutes for first-time installers including verification checks .
2. What foundation is required for an expandable house?
The ground must be level within ±50mm. Concrete slabs offer the most stability, while compacted gravel and timber pads work for temporary placements. No excavation is required for standard installation.
3. Can expandable houses connect to municipal utilities?
Yes. Units come pre-wired and pre-plumbed. Connect the main power inlet and water pipes to local systems. For off-grid sites, solar systems (recommended 5KW for 20ft unit) and water storage tanks can be integrated .
4. What insulation options are available for different climates?
EPS, PU, rock wool, and PIR panels are available with customizable thicknesses. PU panels plus graphene underfloor heating are recommended for cold climates .
5. Do expandable houses meet international building standards?
Many manufacturers produce units meeting AU/NZ/US/EU standards with asbestos-free materials. Verify specific certification for your target market before purchase.
Welcome to contact us for more information.manager@ruhaimaterial.com;https://ruhaimaterial.com/products/